Getting Started
Getting Started — Coding in the browser
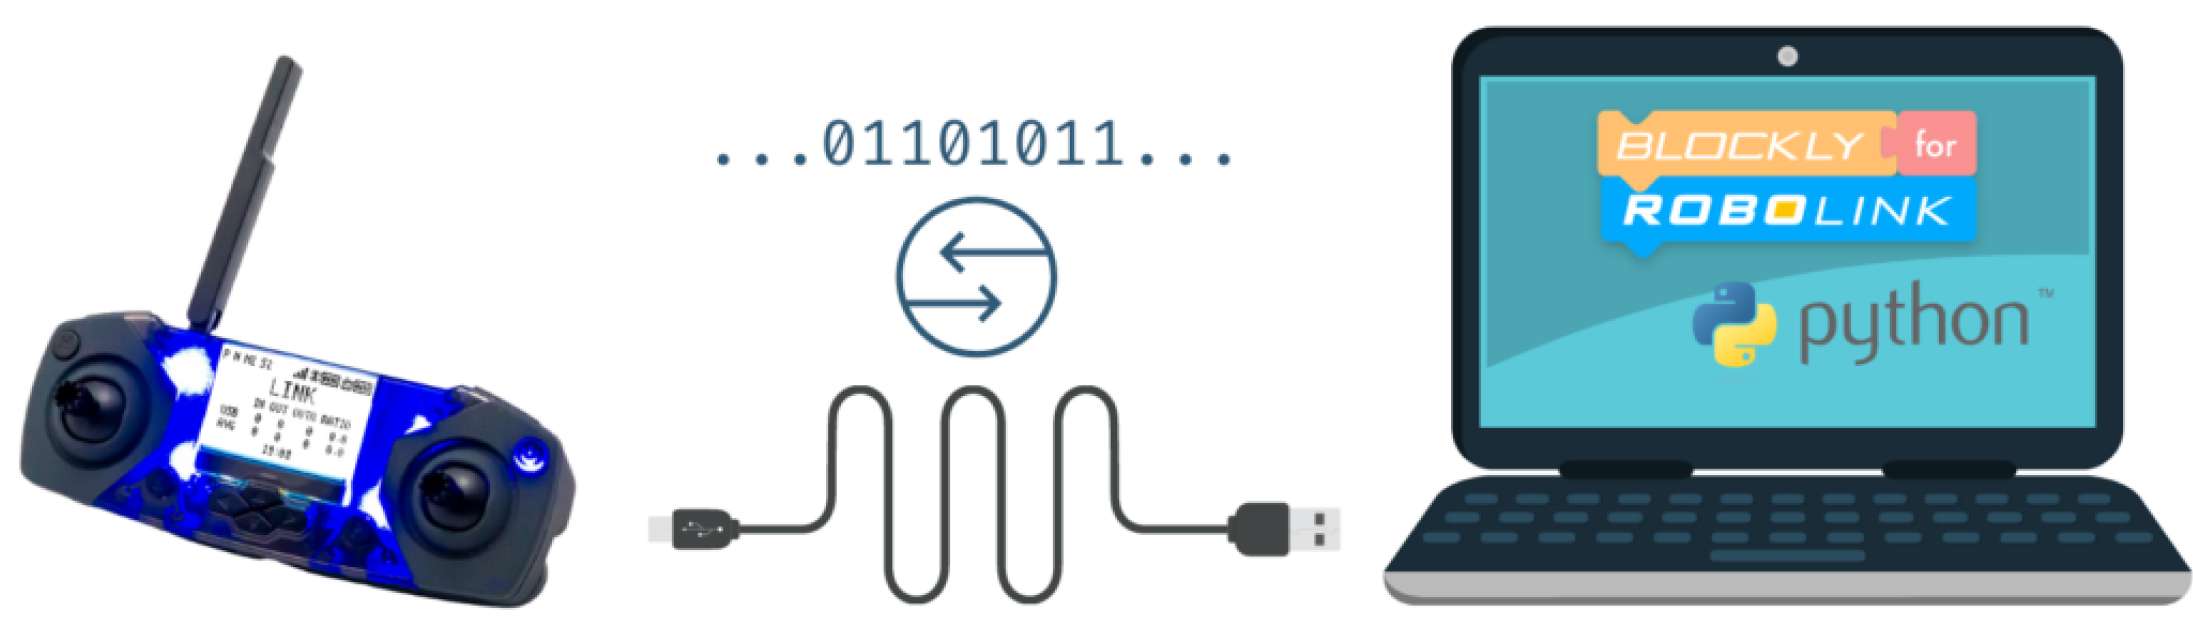
What is Python for Robolink?
Python for Robolink, a browser-based program, allows you to connect to and program your drone without needing to install Python or an IDE (integrated development environment).
Why did we create two ways to code in Python?
While we still suggest using the desktop version by downloading PyCharm to your computer, we wanted to ensure that everyone has the opportunity to learn Python. Python for Robolink is ideal for people who do not have access to a device that has the capability of downloading and storing applications.
Use Python for Robolink if...
- You are using a Chromebook
- You do not have space on your current device to download PyCharm
- Your IT team has not installed PyCharm on your computers yet
- You do not have time to install PyCharm on every device
New Python for Robolink Updates
Python for Robolink has a new theme! Before jumping into Python for Robolink, we'd like to go over the main changes: new file explorer functionality and new Console location.
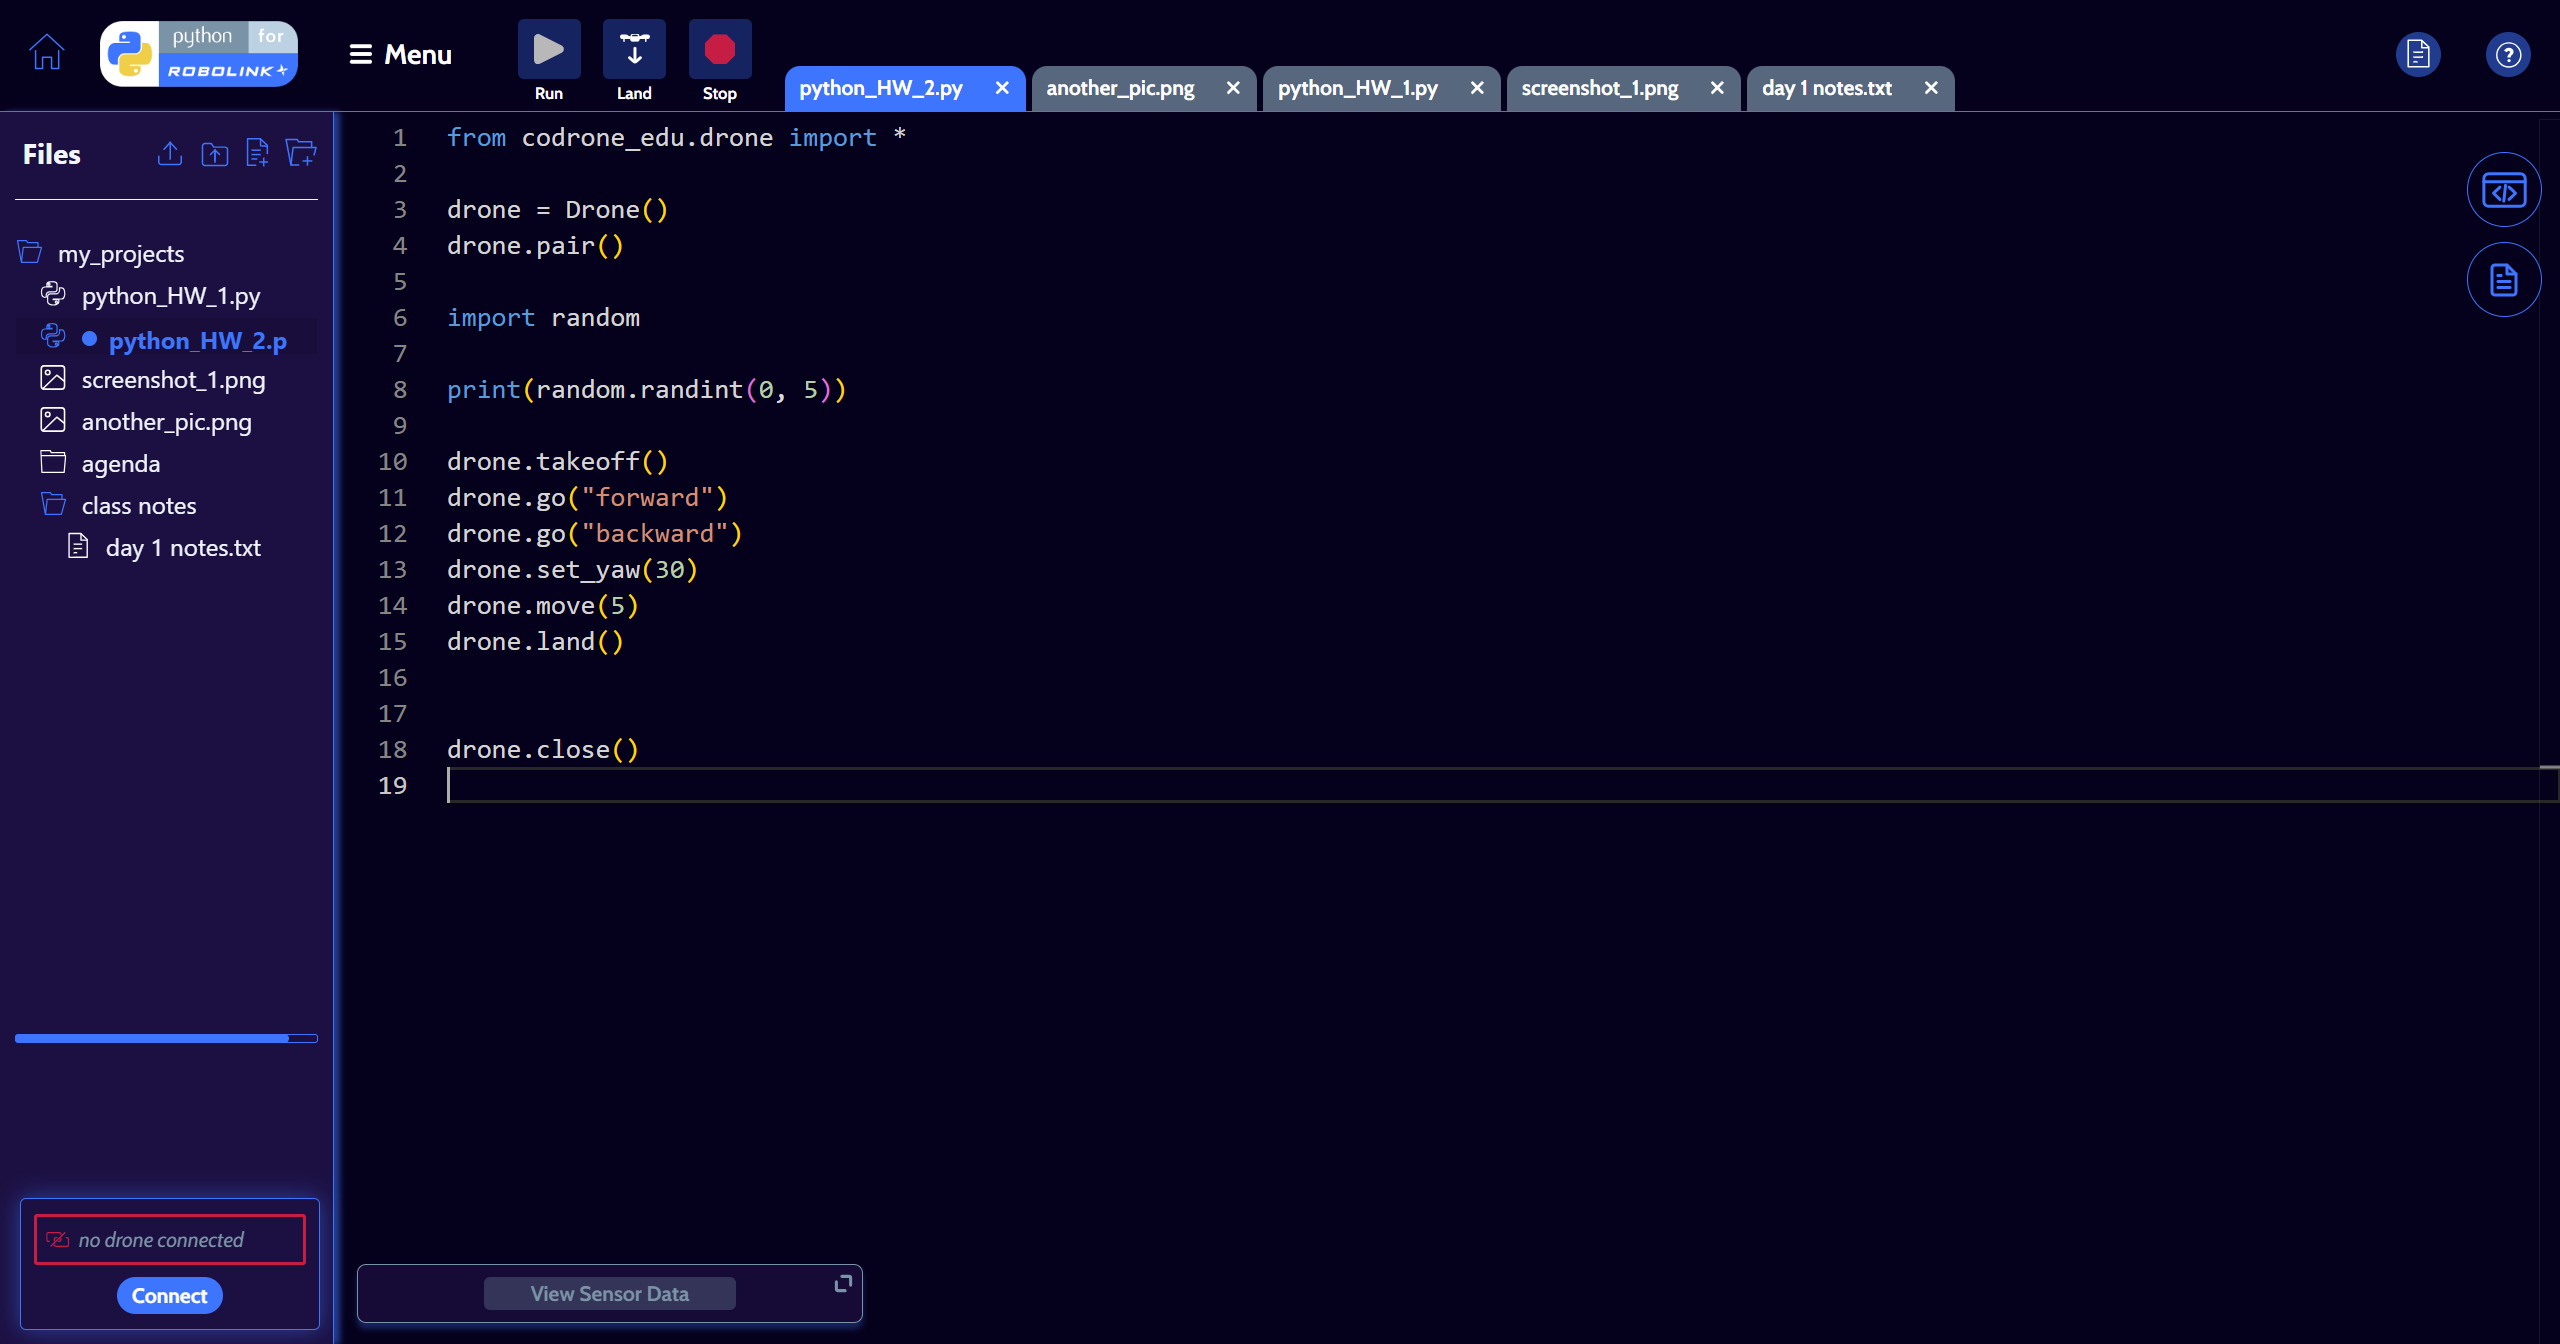
File Explorer
The File Explorer is located in the left section of the Python for Robolink page, "Files" as the heading. With the File Explorer, students can work on projects with multiple Python files, organizing related code into folders (e.g., separate files for different drone behaviors or experiments). This teaches good programming practices early on. The tree structure helps students understand file organization and how projects are structured.
-
Upload/New File or Folder Icons
- These icons are located in the top-right side of the File Explorer, which are used for uploading and creating files or folders.
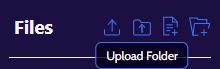
- You can upload JPEG, PNG, Python, and text files and folders that contain the aforementioned file types.
- You can create new Python and text files and folders.
-
File Tree
- The File Tree is located below the "Files" heading. The File Tree is the main part of the File Explorer, which provides a visual of how files and folders where files and folders are being stored.
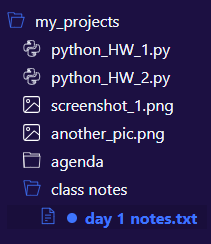
- Clicking on a folder item will expand or collapse the folder. If expanded, the folder icon will be highlighted blue.
- Clicking on a file item will create a new tab on the top of the code editor.
- Right-clicking on a file or folder item will open a small pop-up, providing options to rename, delete, etc.
Color Training Tool
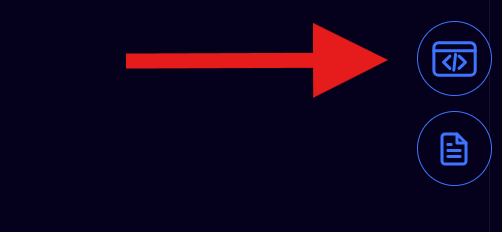
The Color Training Tool is located in the right side of Python for Robolink. The Color Training Tool is used to be able to detect custom colors through the process of collecting, training and testing color (HSVL) data from the color sensor. We will briefly go over its main features:

- Color Tool Main Menu
- Clicking on the "Color Tool" button will open the Color Tool panel, which provide an overview of color training and 2 options: "Upload Color Data" and "New Color Data".
- Uploading a Color Dataset
- "Upload Color Data" will prompt you to upload a folder (color dataset) that contains valid color data (.txt files).
- Creating a Color Dataset
- "New Color Data" will prompt you to start collecting color data from the color sensors and labeling each collection of color data. This is the "training" process. You must collect and label 2 colors to proceed to next step.
- Testing a Color Dataset
- After clicking "New Color Data" and training color data, you can click on "Test Color Data" to start testing your custom colors. You will be able to see the predicted color, a button to download the color dataset, and a button to "Finish and Continue", which will store your color dataset into a folder called "color_data" in the File Explorer.
We will be releasing new content on how to utilize these color datasets in the near future!
Console
Since the new theme, the Console has changed locations. The Console panel can be opened by clicking on the "Console" button, which is located in the right side of Python for Robolink. The Console panel is responsible for showing any output, prompting user input, and providing error/warning messages.
How to Access Python for Robolink
Since Python for Robolink is a browser-based program, it can be accessed from any device that has Google Chrome, with the exception of iPads, tablets, and cell phones.
Link to Python for Robolink
Start programming your drone with Python for Robolink by heading to codrone.robolink.com/edu/python/
Getting Started — Coding in PyCharm
How to install Python
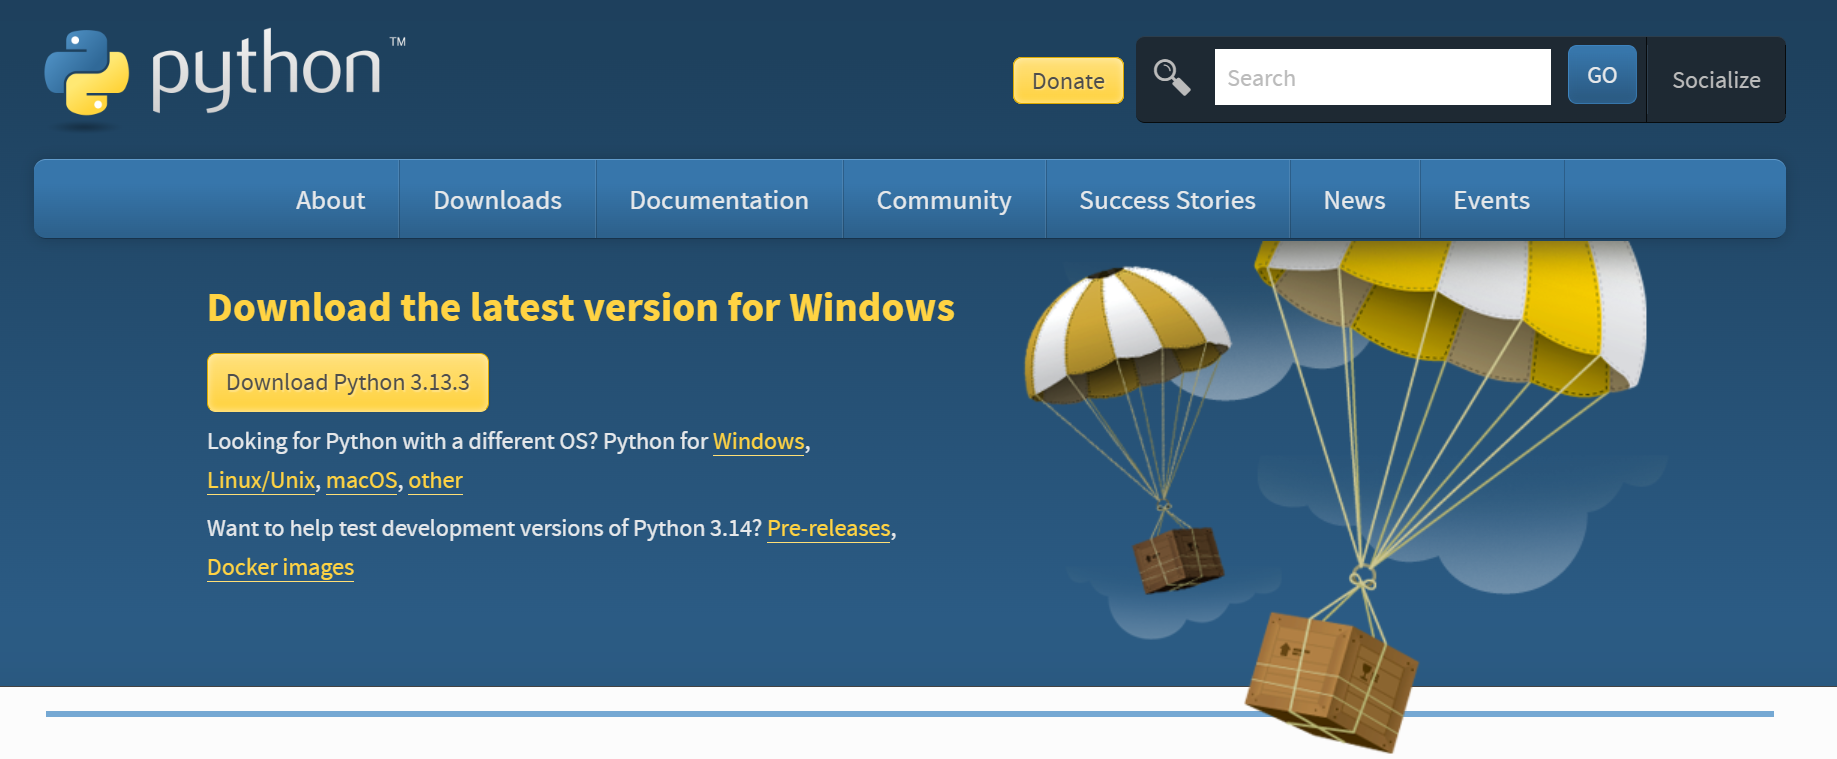
Install Python on your Mac or Windows machine. If you’re using a guest or limited account, make sure you have access to admin credentials for installing new software on the computer. This is especially important for students using a school computer or parent computer with limited access. If you’re on a Mac computer, you may need to modify the security settings in system preferences in order to download software.
Click here to go to the Python website to find the most recent Python releases. It is recommended to click on the yellow 'Download Python 3.XX.X' button, which downloads a recent release of Python and allows you to skip a few steps in the video below. Follow along with the instructions in the video below. Regardless of the Python version shown in the video, the instructions will still apply.
Installing Python in macOS
Installing Python in Windows
How to install Pycharm
Next, install PyCharm Community (free) edition , which is what we'll use for writing out our Python code and running it on CoDrone EDU.
If you choose not to use PyCharm and prefer your own editor or IDE, you will need to know how to install packages on your platform of choice. If you are not sure how to do this, we recommend following the tutorial for PyCharm instead.
Click here to go to the PyCharm download page and follow the instructions in the video below.
How to install CoDrone EDU library
Now you need to create a new project and set it up with the CoDrone EDU library. Follow along with the video instructions below. In the tutorial, you will need to copy and paste the import statement into the generated main.py. You do not need to connect your drone yet.
from codrone_edu.drone import *
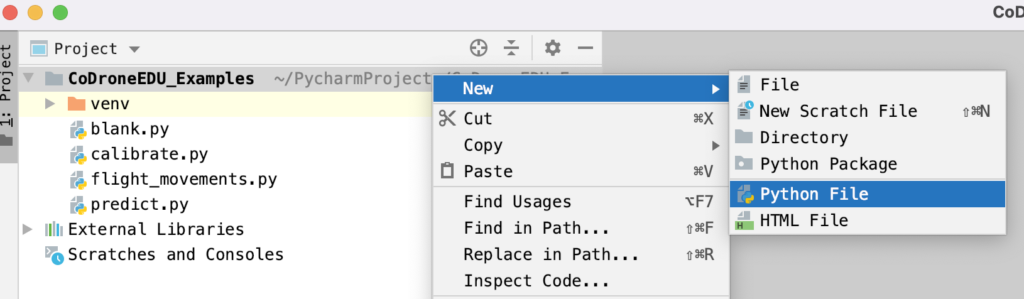
If a main.py file was not generated, you can make a new one by right clicking on the project name and selecting "New > Python File". This is for both Windows and Mac.
System Requirements
Device Requirements
-
MacOS, Windows, or ChromeOS* (*PyCharm is not supported on Chromebooks)
-
Mobile devices such as tables (iPads, Android, etc.) are not supported
-
A computer with a USB-A port
-
Windows 10 or newer for PC users
For the best experience, it's recommended to keep your browser and devices up-to-date.
Hardware Requirements
Try to use the cable that comes with CoDrone EDU whenever possible! This USB cable can transfer data, which is necessary for programming. Most USB cables now are data compatible. If your drone does not switch to LINK state when connecting, you may have the wrong cable or it may be broken.
Google Chrome Requirements
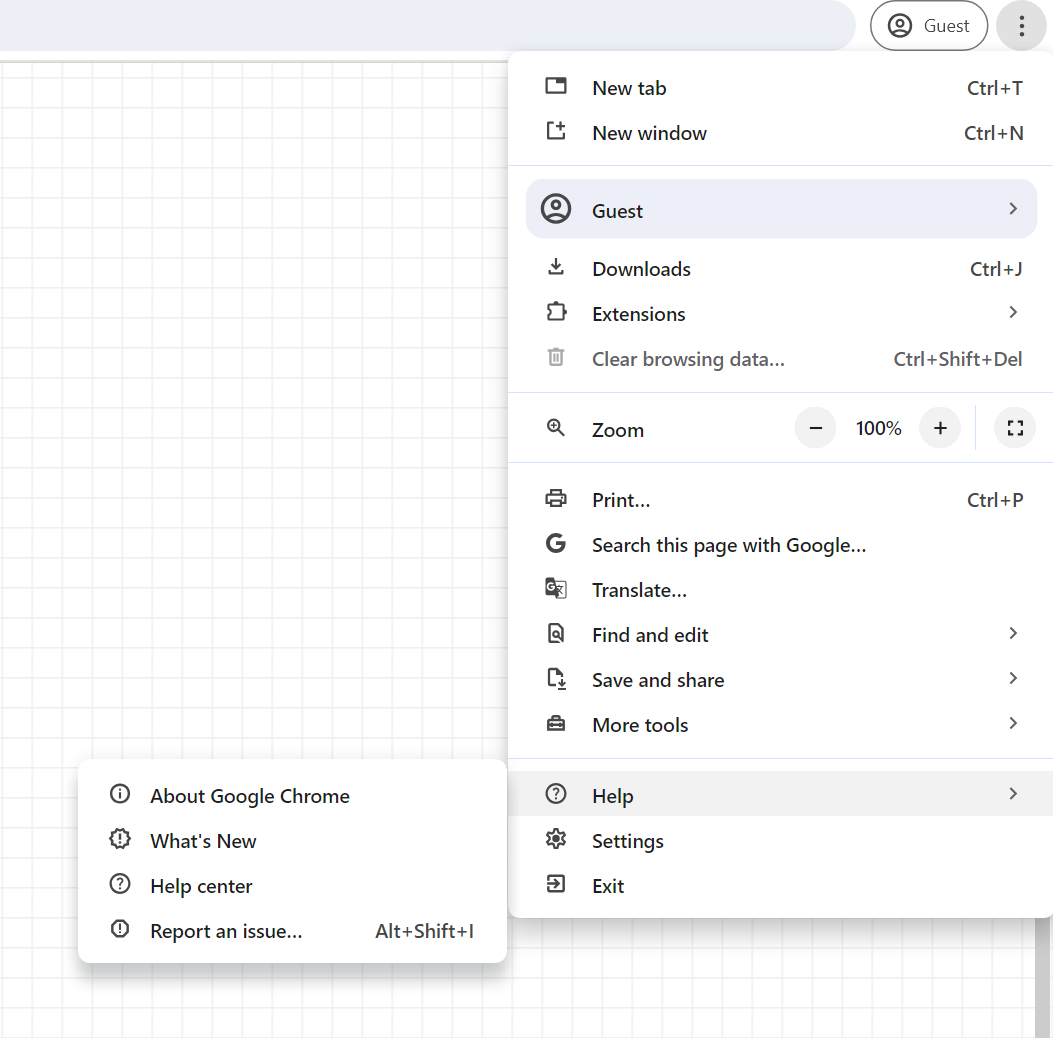
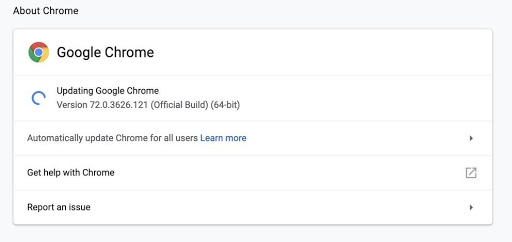
Your Google Chrome should be updated to the most recent version. If you are not sure how to check, click on the the menu on the top right, scroll down to "Help", and select "About Google Chrome". Google Chrome might automatically update. If not, please update Chrome.